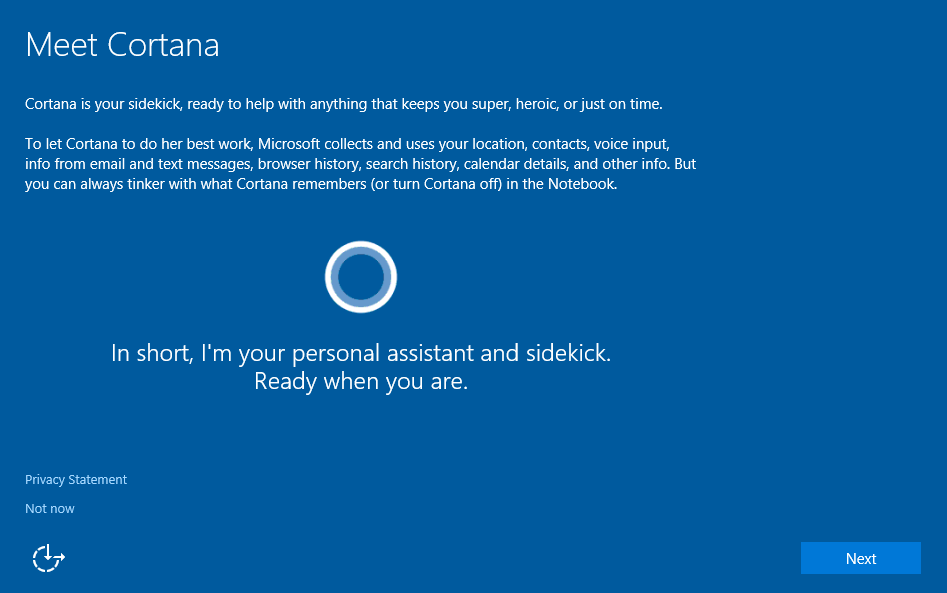
Windows 10 is packed full of new features and improvements over its predecessors. However, perhaps the biggest new feature that arrived with it is Cortana. This is Microsoft’s new digital assistant, and it was released as a competitor to Apple’s Siri and Samsung’s Bixby. It collects some of your data to learn more about you and becomes more efficient as it starts to understand you better.
In older versions of Windows 10, a simple and easy On/Off toggle switch you could access within settings allowed you to disable this digital assistant. Unfortunately, nowadays, it seems that Microsoft does not want you to disable Cortana.
Starting from Windows 10 version 1607, the toggle switch was removed, making the process of disabling the assistant way lengthier and more cumbersome. So In this guide, we will explain every single way to disable Cortana in Windows 10 easily.
How to Disable Cortana in Windows 10
Since the user-friendly option of a toggle switch is no longer available, you will have to edit the Windows Registry to disable Cortana. If you are using Windows 10 Home, that's the only way. However, if you have either Windows 10 Professional or Enterprise, you can disable the assistant from the Group Policy Editor. We recommend you use the latter method if possible.
Disable Cortana using Registry
Warning: Windows Registry Editor is a powerful tool capable of destabilizing your system or rendering it completely unusable if misused. The following tutorial is very thorough; as long as you stick to it, you should not face any issues. Regardless, we strongly advise you to read up on using the registry editor before trying the instructions. Also, DO NOT forget to back up the Registry before making any changes to it.
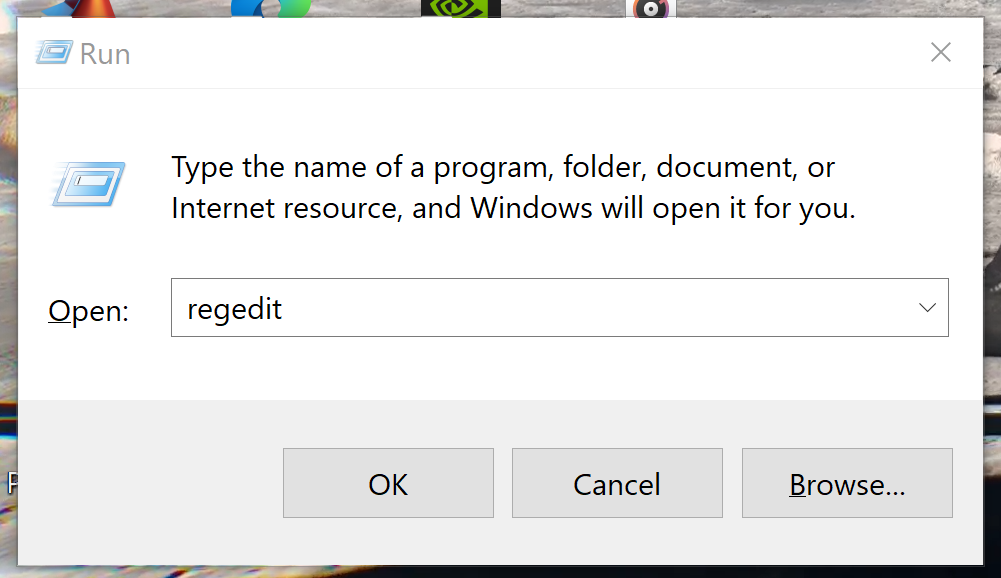
Step 1: First, you need to open the Run utility by pressing the Windows and R keys simultaneously. Then, in the Run dialog box, type regedit and press the Enter button.
Step 2: Go to the following directory from the left sidebar.
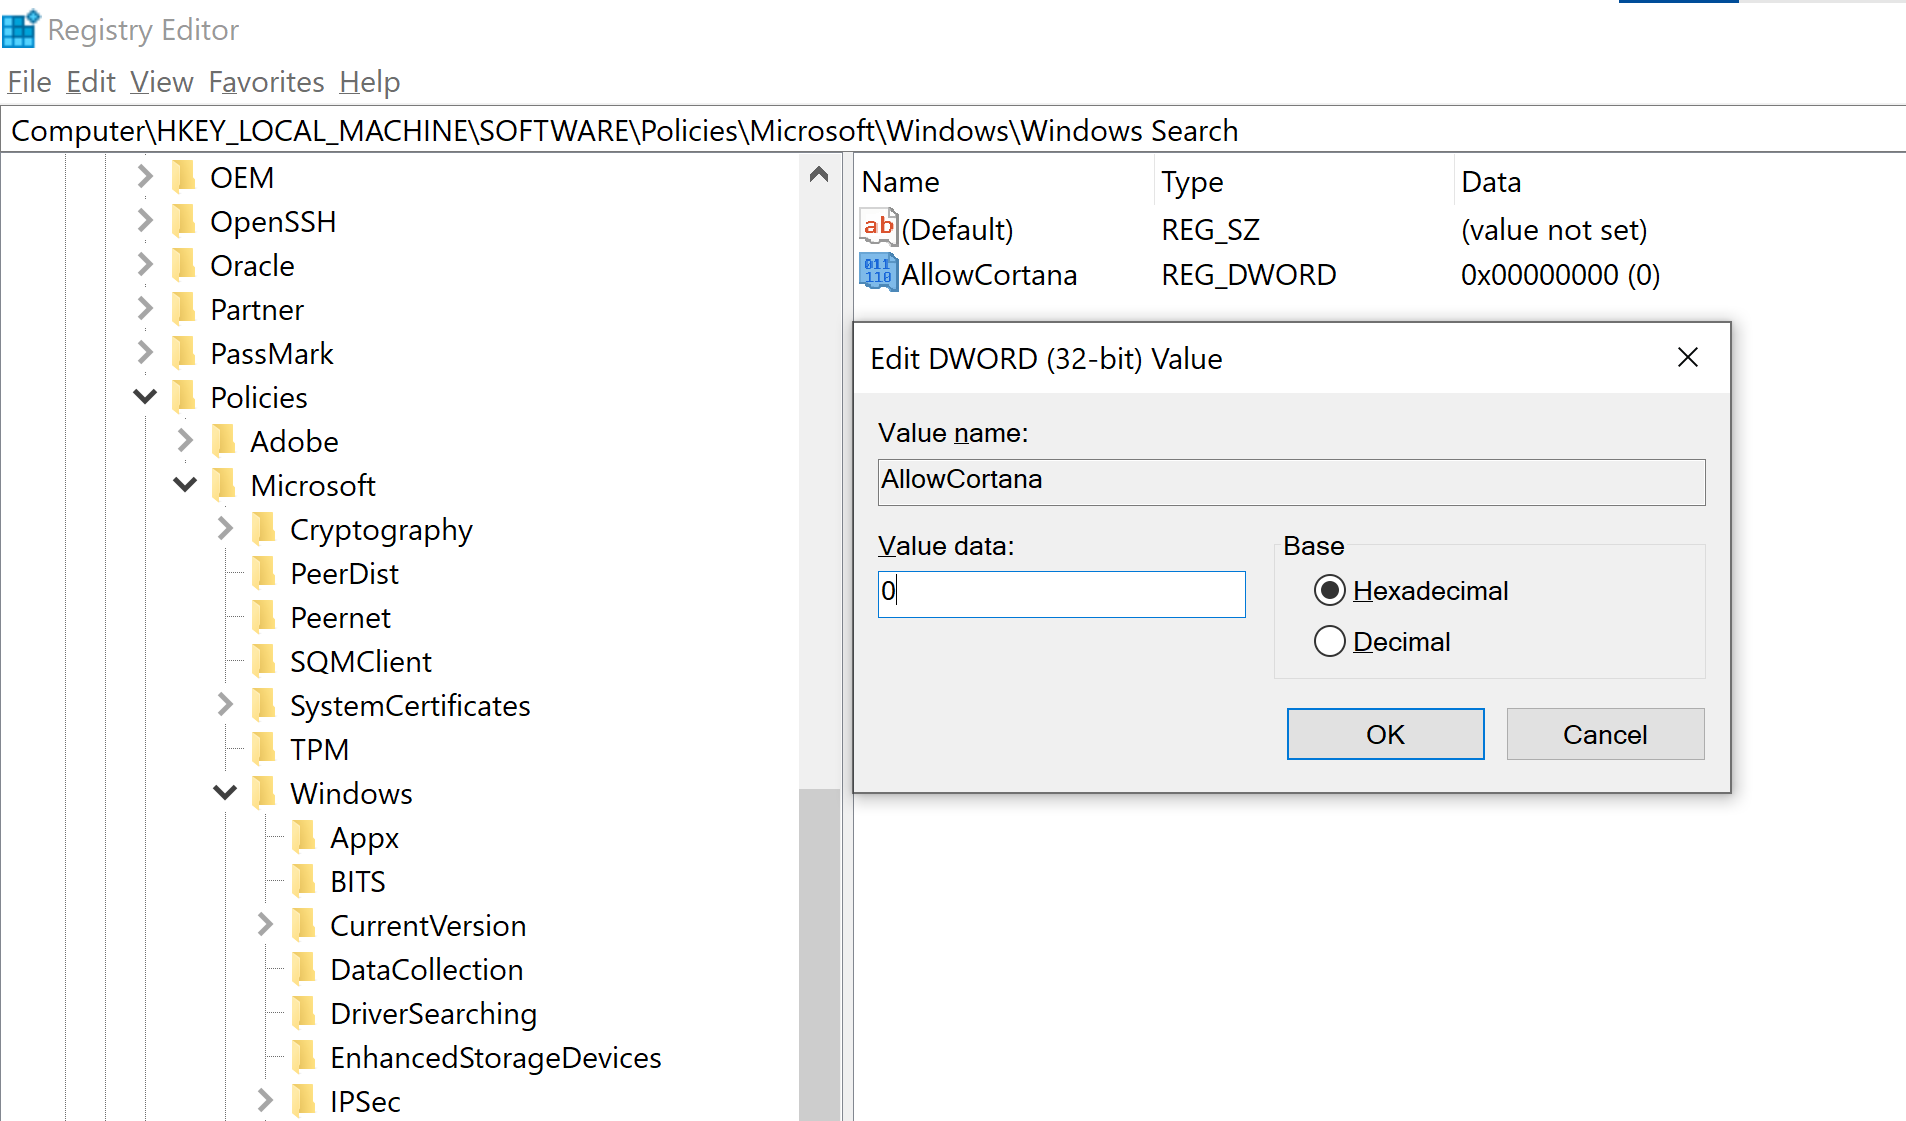
HKEY_LOCAL_MACHINE\SOFTWARE\Policies\Microsoft\Windows\Windows Search
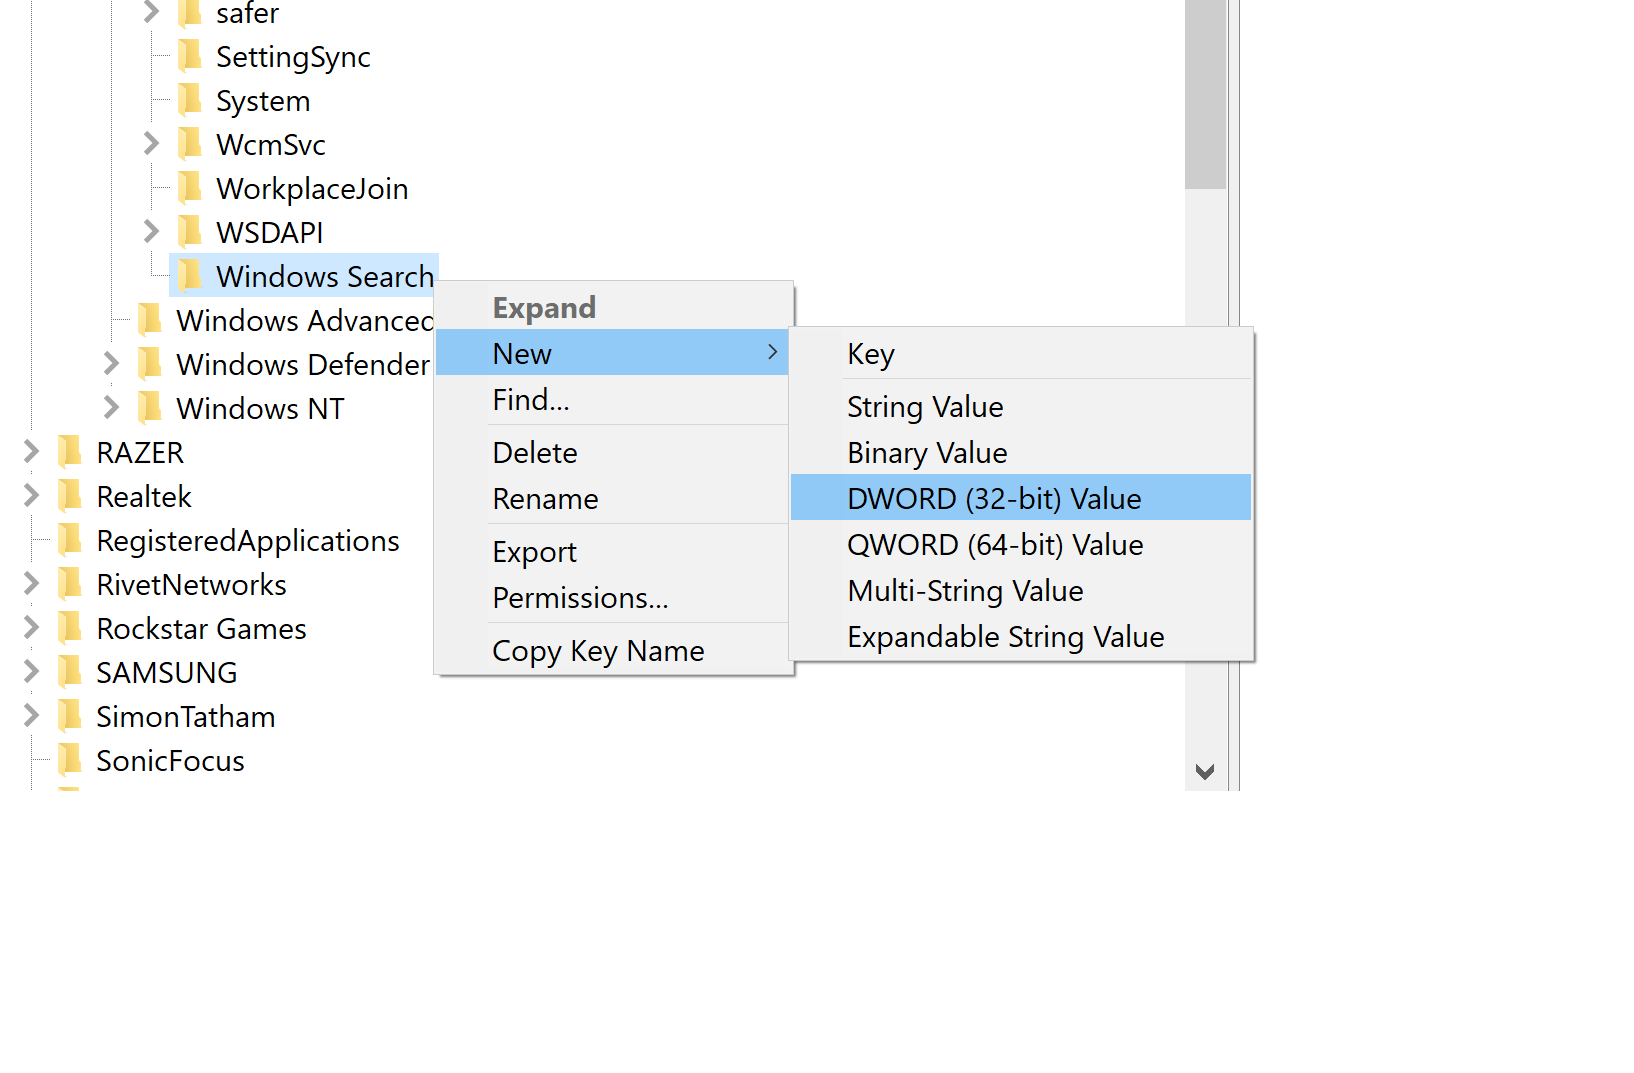
Note: In case you don't see a "Windows Search" key (folder) below the Windows folder, right-click the Windows folder and select New > Key. Name it "Windows Search."
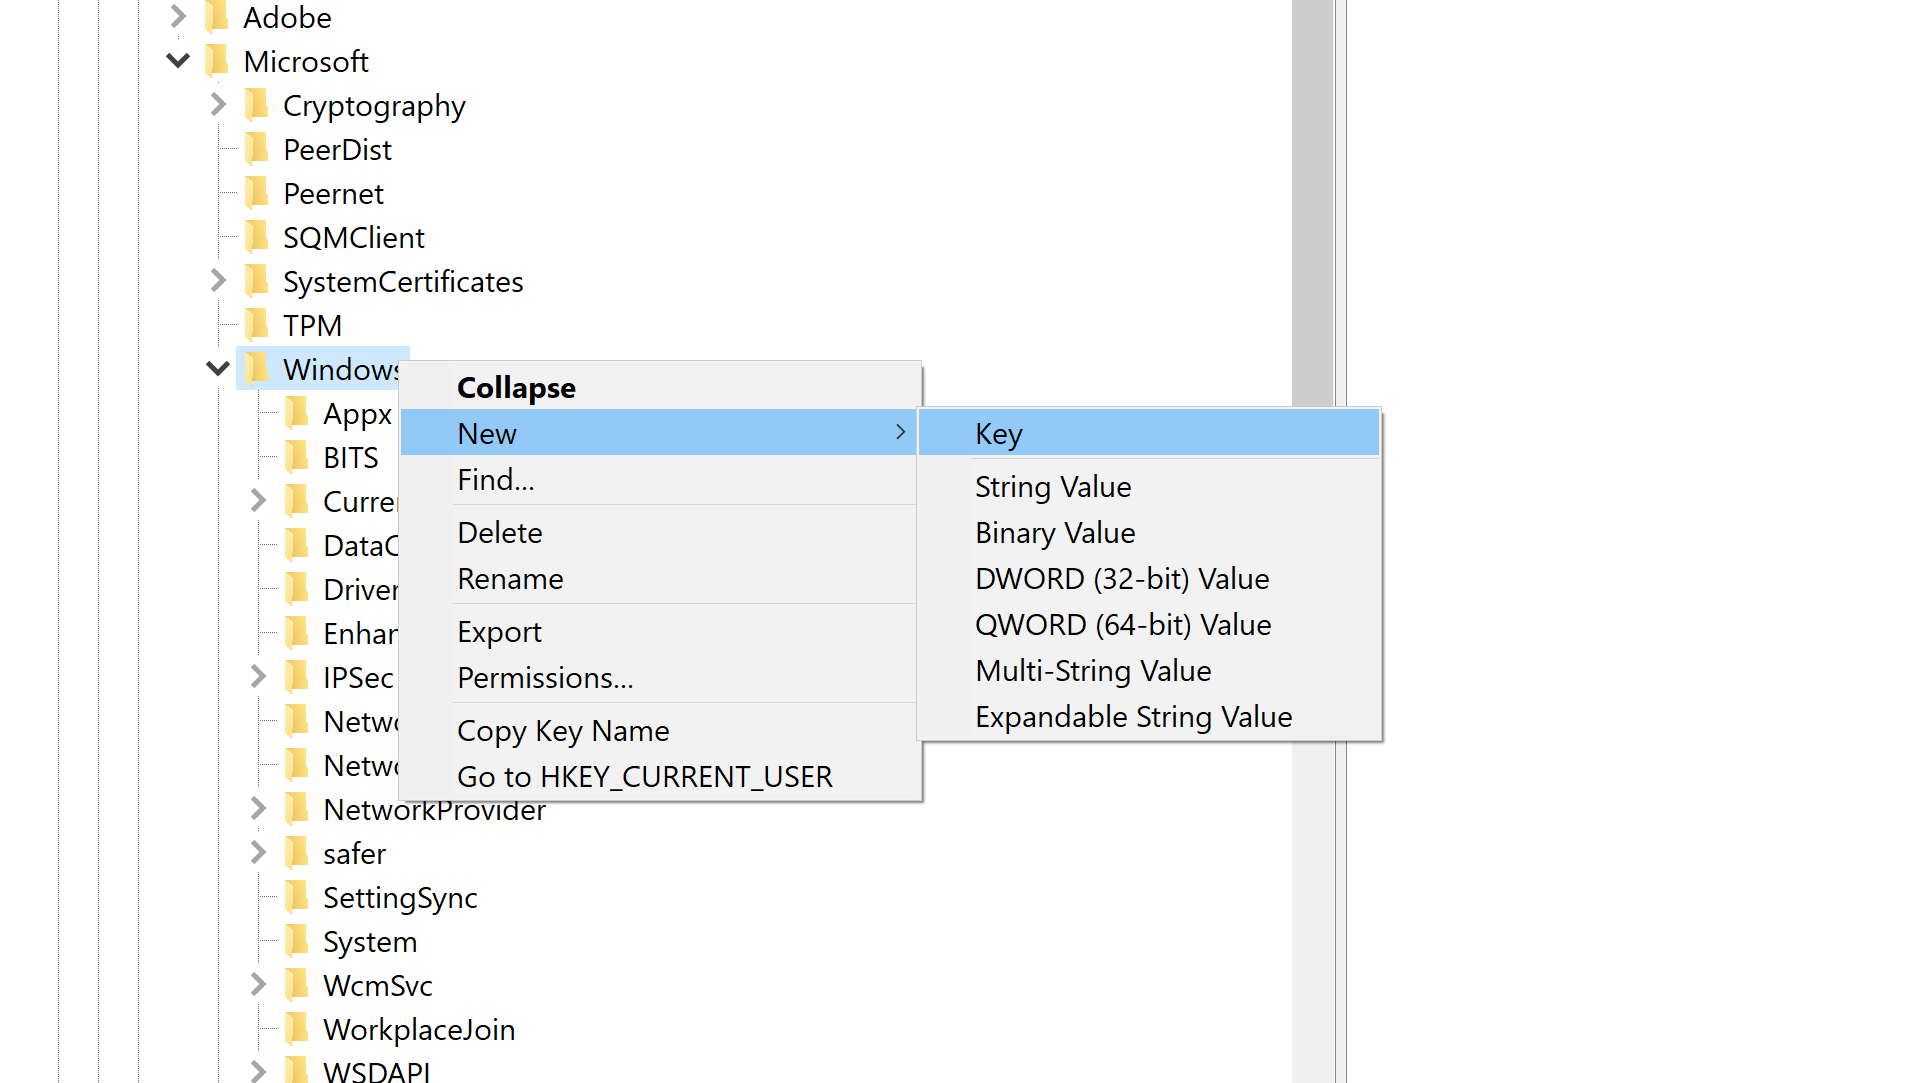
Step 3: Right-click the Windows Search key (folder) in the left pane and select New and DWORD (32-bit) Value.
Step 4: In this section, name the value AllowCortana and double-click it, then set the value to 0.
Step 5: Finally, close the registry editor and restart your system to make the changes successful.
In case you want to re-enable Cortana, follow the same steps, but make sure you set the value of AllowCortana to 1.
Disable Cortana using Group Policy
Remember, this process is only applicable in Windows 10 Professional and Enterprise. Using the Group Policy editor, you’ll disable Cortana here.
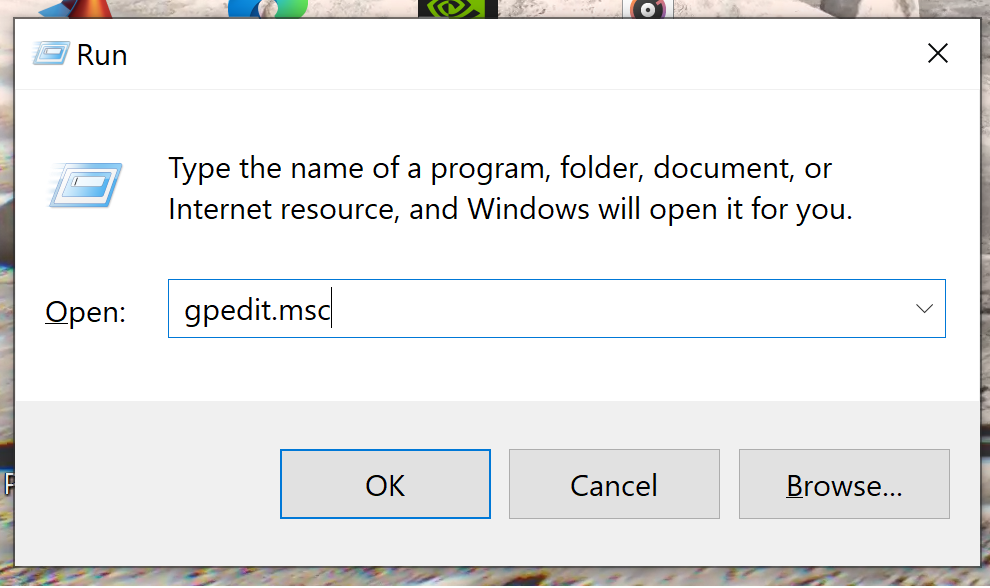
Step 1: First, open the Run utility using the Windows and R keys and type gpedit.msc.
Step 2: After typing the command, press the Enter button to open the configuration window.
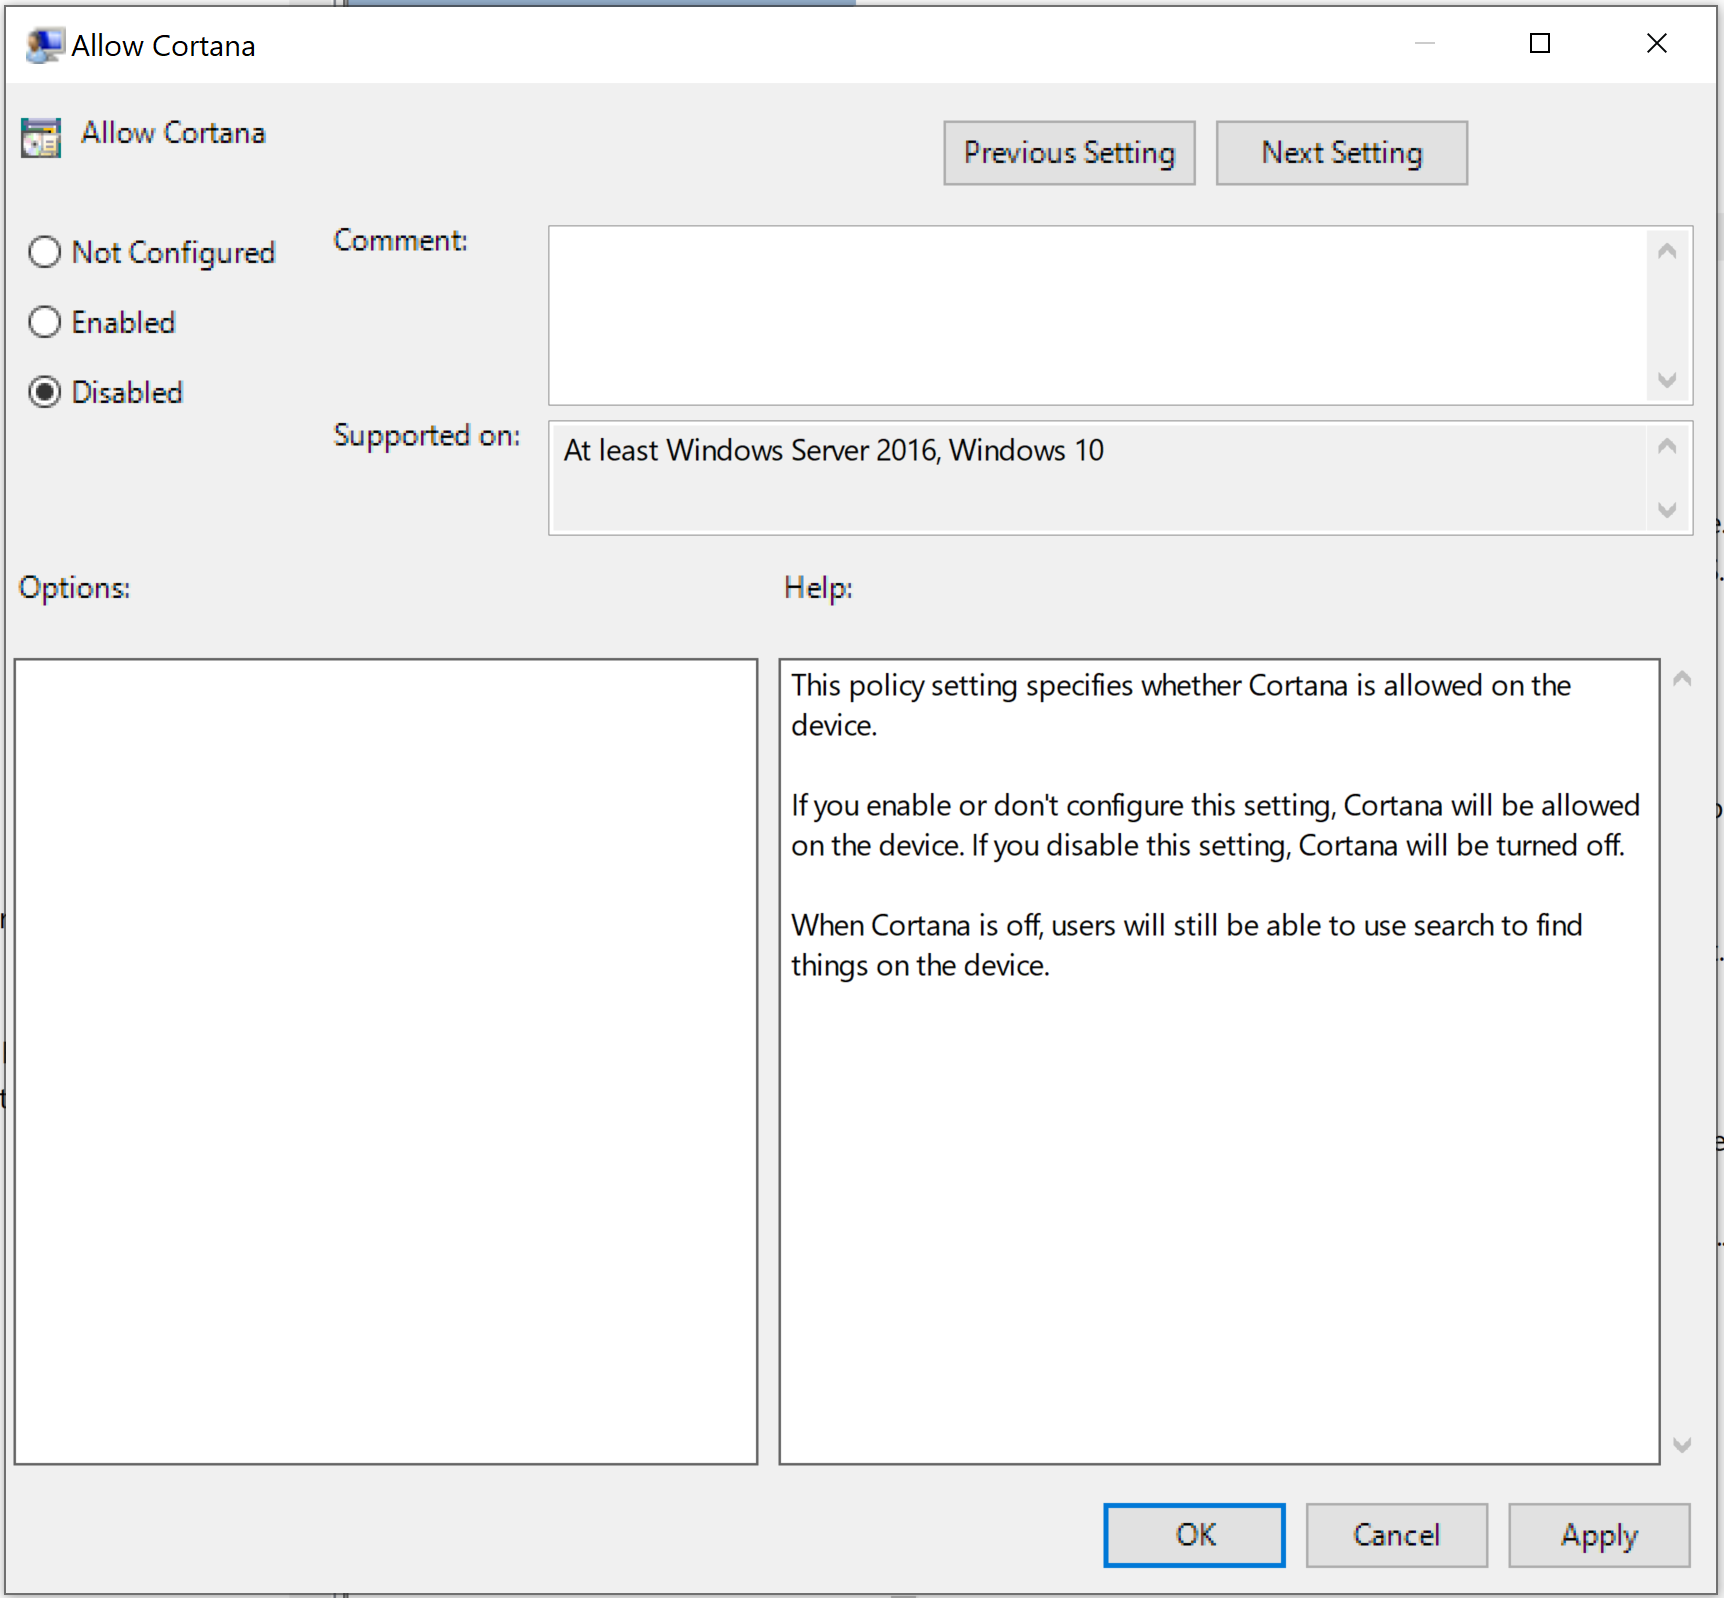
Step 3: Now go to Computer Configuration > Administrative Templates > Windows Components > Find the Allow Cortana setting in the right pane and double-click it
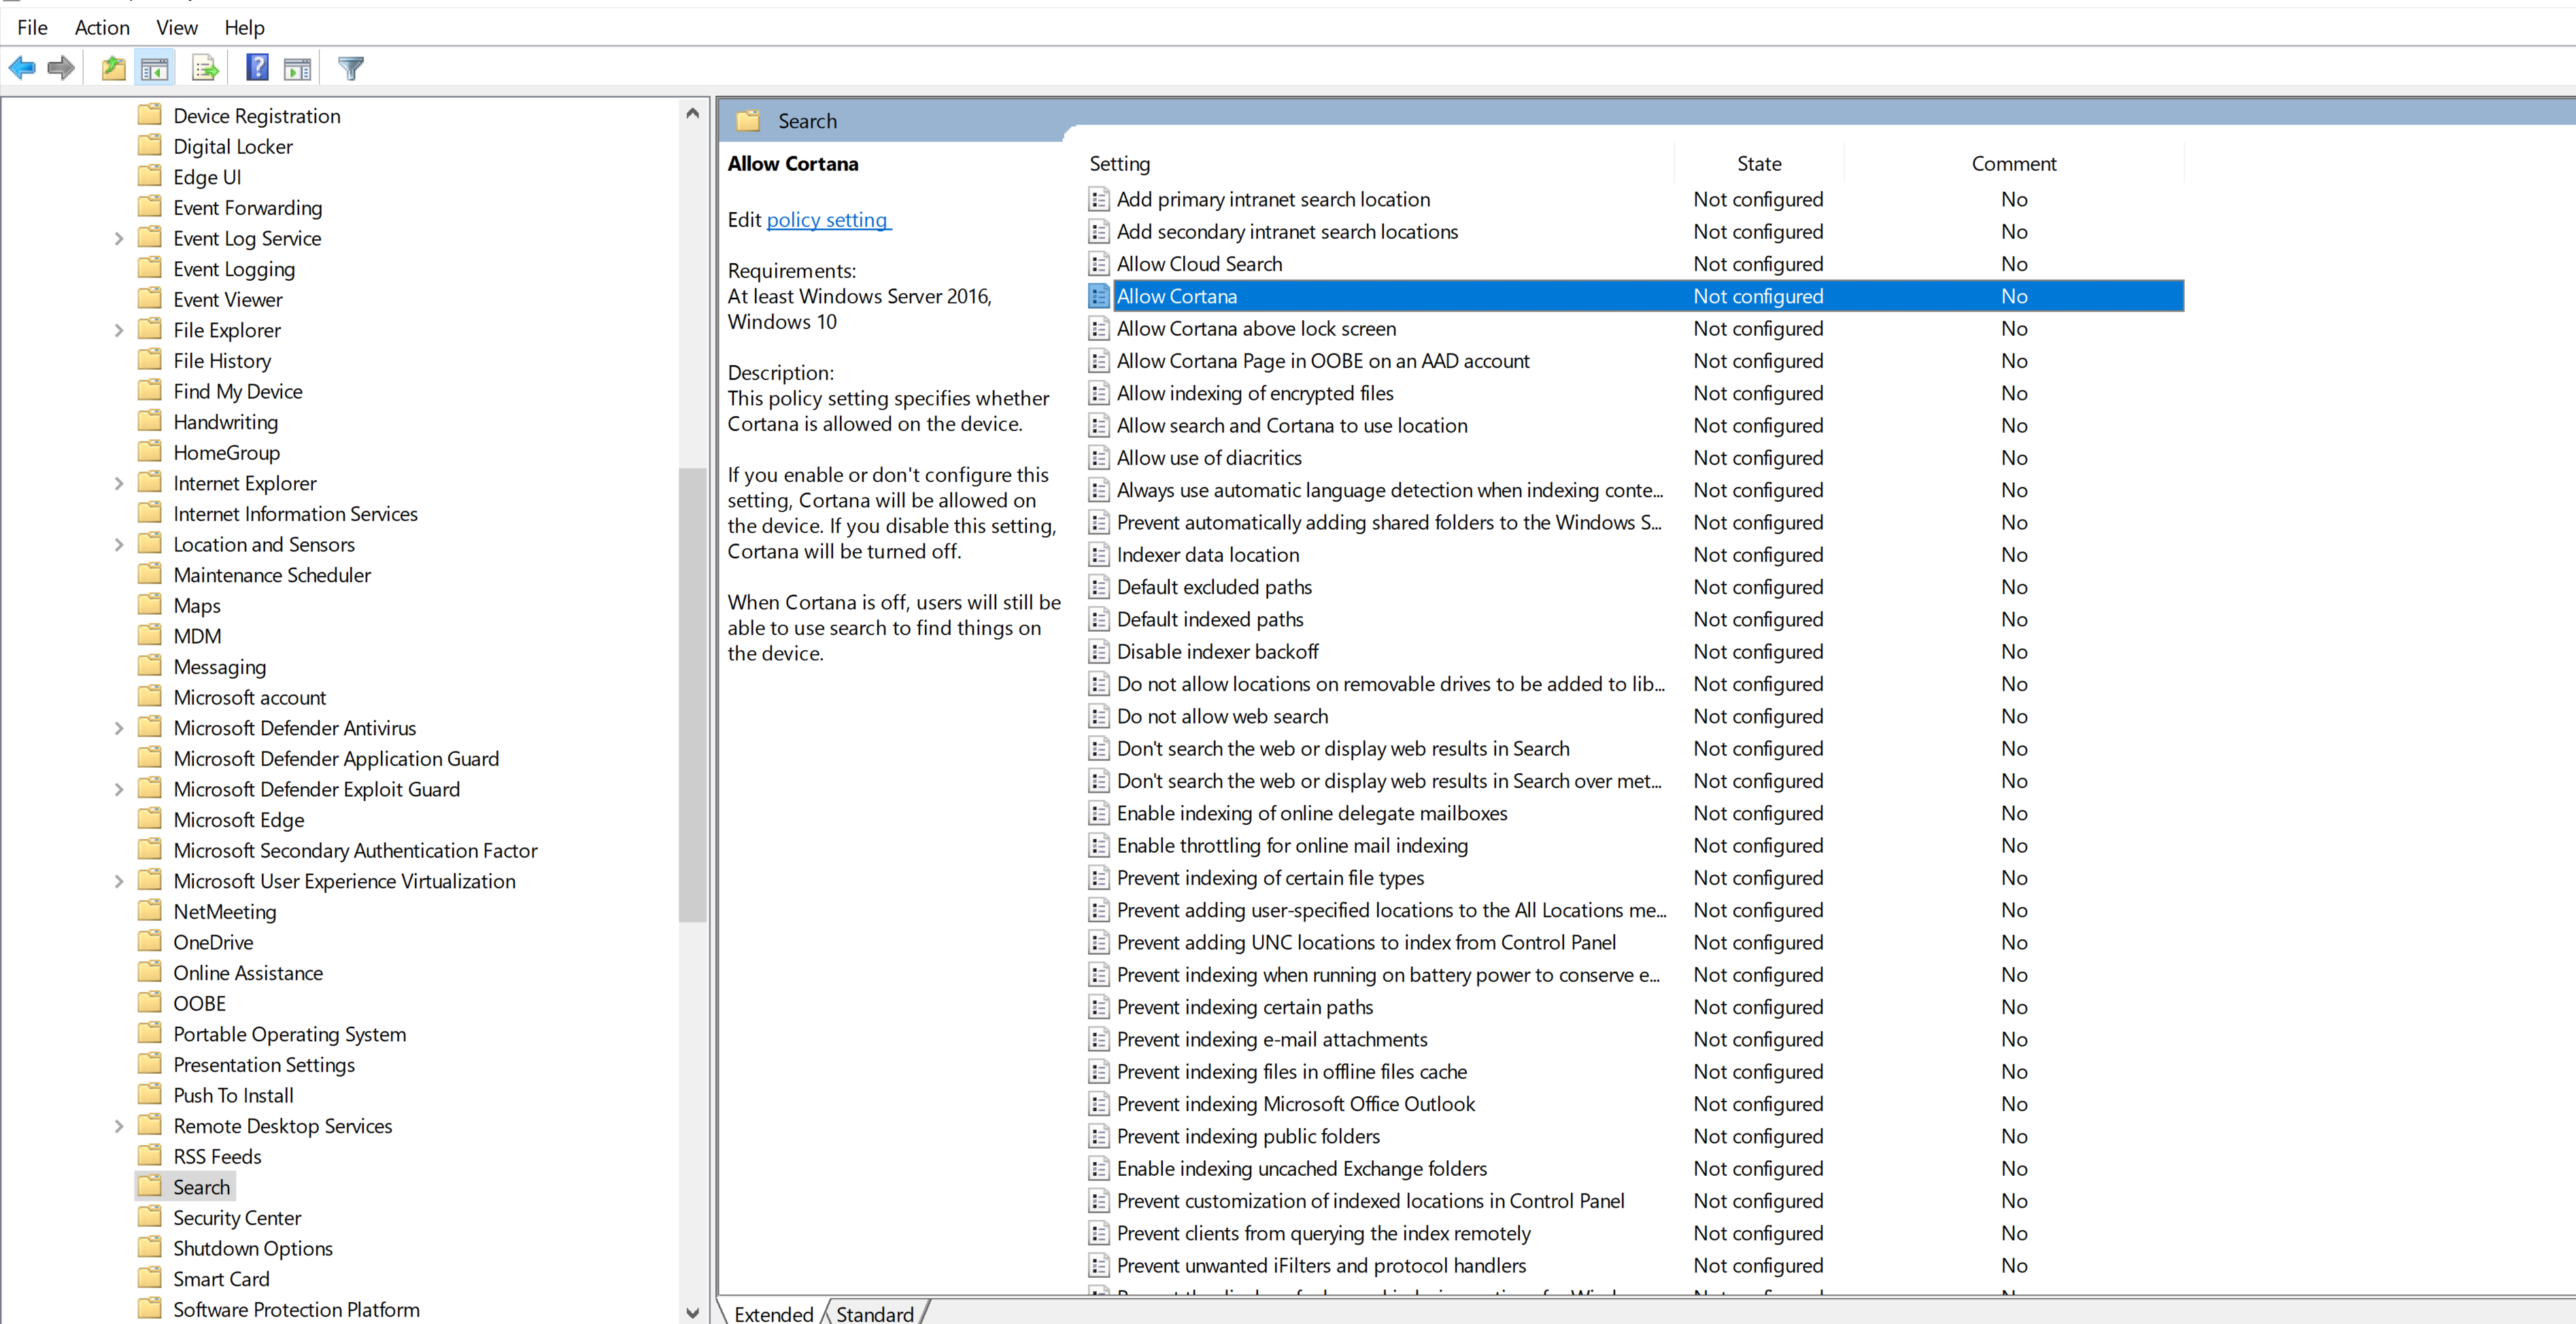
Step 4: After that, you can set the Allow Cortana option to Disabled and click OK.
Step 5: Now you can close the group policy editor and restart your computer
If you want to re-enable Cortana, follow the above procedure again, double-click the Enable Cortana setting, and change it to Not Configured or Enabled.
Disable Cortana Temporarily
In case you are looking for a process to Disable Cortana Temporarily, then follow the below procedure:
- First, disable the voice response feature of Cortana, so click on the Cortana icon from the taskbar and open it.
- Now click the three vertical dots in the Cortana app's upper-left corner.
- After that, select the settings and click on the keyboard shortcut. You have to turn off this keyboard shortcut and restart the system to make changes.
- Once you reboot the system, repeat the above steps and click on the voice activation again.
- Select the voice activation permission and then turn off the Let Cortana respond to the "Cortana" keyword option.
Conclusion
So this is how you can easily disable Cortana in Windows 10. We have included and described every possible way to disable Cortana without having any trouble. If you like this guide or want to ask something, please let us know in the comment section. You can also go through our website, as we have various guides.
Check out also:
- What is an SSID, and How to Find Yours
- What is a VPN Kill Switch and Why Should You Use It?
- How to Check for DNS Leaks
Do you value your privacy online?
Use VPN Surf and surf safely and securely in the open waters of the internet.
1787